
Neck Modification Tutorial
June, 2009: I had always wanted an SD13 body for Meta, as I knew the Yugiri (Seirei) body and the SD10 body were just too young for what I wanted... however from the first time I put the head on the body I knew that I would need to modify the neck to be slimmer, like I'd done with Raziel.
For me, the neck was just too thick and gave him a buff look, like a guy who works out a lot, which was totally not in line with his slim, geeky programmer persona. ^^; So it was time for some modding. And this time, I decided to make a tutorial, for those of you who would like to try the same thing at home! So here goes. Are you ready? (^^)

What We'll Need
* The Body: well, yeah. All you want is the torso, so put everything else away.
* The Head: you will want to keep the head nearby to test how you like the size of the neck. Be careful to keep it away from your work area so that it doesn't get damaged or covered in resin dust!
* Cera Kanna: this is the ceramic knife that Volks sells - it's the black handled thing with the white blade. You will be using this for the main modifications. Because it is ceramic, it won't cut your fingers, but it is perfect for cutting resin. You can use other tools but I recommend this. Get the default type with the blade as shown here. (There is a thinner blade but it will be too thin for this job and everything will take longer.)
* Sandpaper: you will be using this to sand down the neck after you are happy with the size. I recommend you get two types of sandpaper: one about 300-600 grain (fairly rough, for initial sanding) and one of about 1200-1600 grain (fine grade, for final smoothing and polishing). I use the Zoukei-mura Sponge Paper as I find it very easy to work with, but you can use whatever you find at your local hardware or hobby store.
* Tape Measure: this is not strictly neccessary, but I used this to regularly measure the circumference of the neck and see how much I'd removed. I wanted the neck to be a similar size to the Yugiri (Seirei) body neck so I used the tape measure to keep track.
* Scissors: these are just for cutting the sandpaper into manageable sized pieces.
* Towel/Dropcloth: my towel is horrendously salmon, but it does the job. You need this because you are going to make a mess. I mean it. I recommend you do this outside. I used our balcony with the door firmly shut behind me.
* Facemask: not pictured as I was wearing it, but please keep in mind that you are working with resin dust, and it is very, very bad for your lungs. You only have one set of lungs. Be kind to them and wear a facemask to protect them!
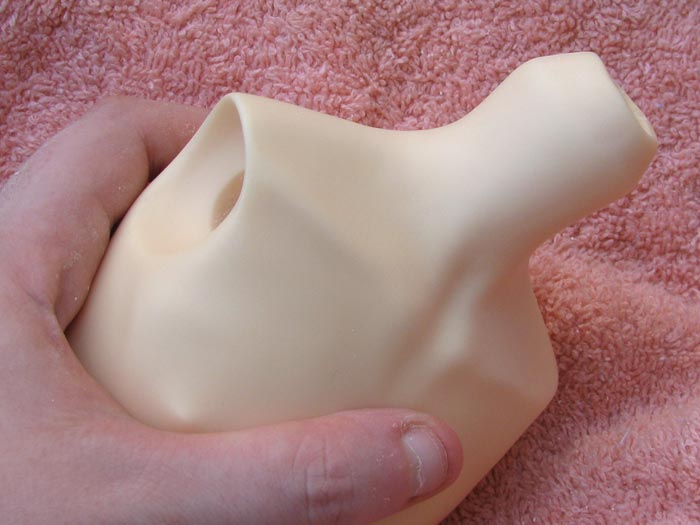
Now, let's get started! The first thing you will be doing is using the Cera Kanna to remove resin from the neck.
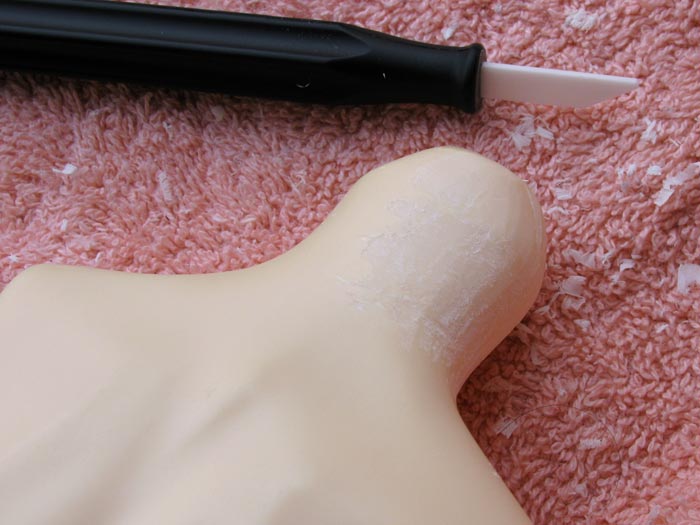
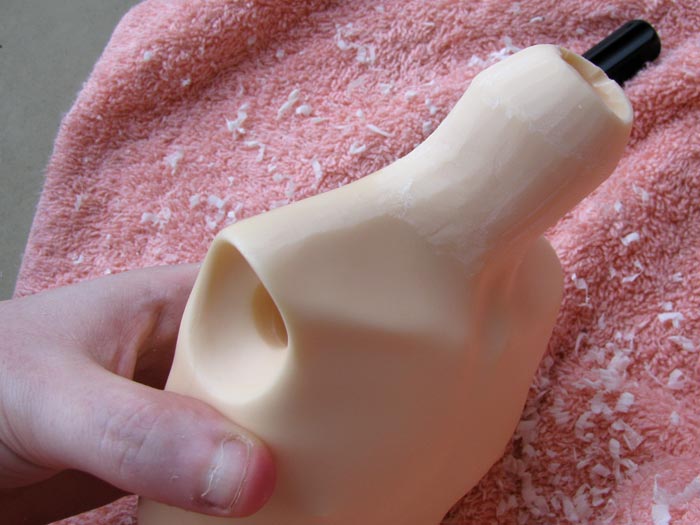
You can see here that I've started and worked around half of the neck. I'm sorry that I could not take pictures of me actually removing the resin to show you the exact process -- I only have two hands, and no-one else to take pics for me. ^^;
Use the angled edge of the Cera Kenna, and start from the bottom of the neck, pressing the blade firmly against the resin and moving it upwards in smooth, cutting/scraping motions. Be firm and apply consistent pressure with your movements. When you first start you may find that the knife will move quite jerkily and you will get a lot of weird scratchy marks on the resin. Don't be alarmed. Remember that you will be removing a lot more of the resin than just that, and you will be sanding the neck afterwards to remove any irregular bumps. Also, the outermost layer of the resin is the toughest. Once you get the first few layers off, the knife will start to move more smoothly.
The most important thing to remember when removing resin from the neck is to do it evenly all the way around. Don't just focus on one side of the neck, or your neck will end up uneven. After you make each scrape, turn the body a little, so that you are always moving around in a circle, and removing resin evenly from all sides.
Also remember to keep in mind the original shape of the neck. You can see that the neck curves inwards at the top for the head to rest on. As you remove resin from the neck, this curve will become less pronounced, so make sure to remove an equal layer of resin from the curved part as well to keep things even.
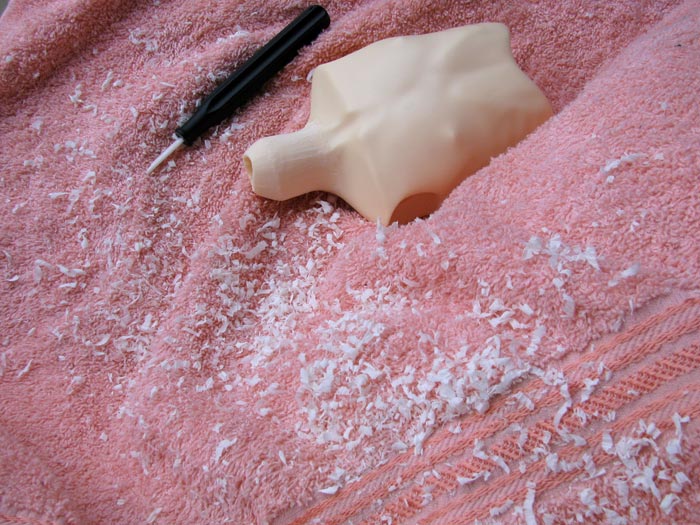
I wasn't kidding; you are going to make a mess. I just wanted you to be sure you understood that. (^_^)
However, you can probably see here that as I have removed more and more resin from the neck, my strokes have become smoother. The resin is coming off a lot easier and it's easy to get into a comfortable rhythm.
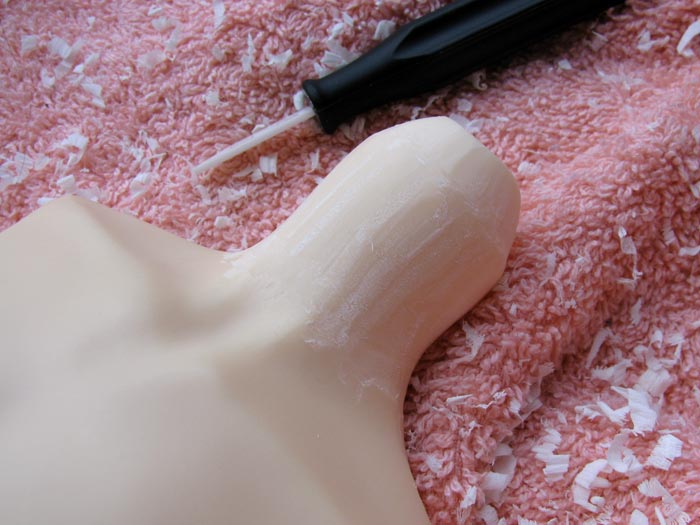
As the neck is getting thinner, you will also want to keep in mind that you are changing the overall shape of the body here. Take a look at how the neckline slopes into the shoulder area. If you feel that the curve looks unnatural (and the more you remove, the more obvious it may seem) then don't hesitate to use your knife to remove some of shoulder area as well to give an overall more natural look.
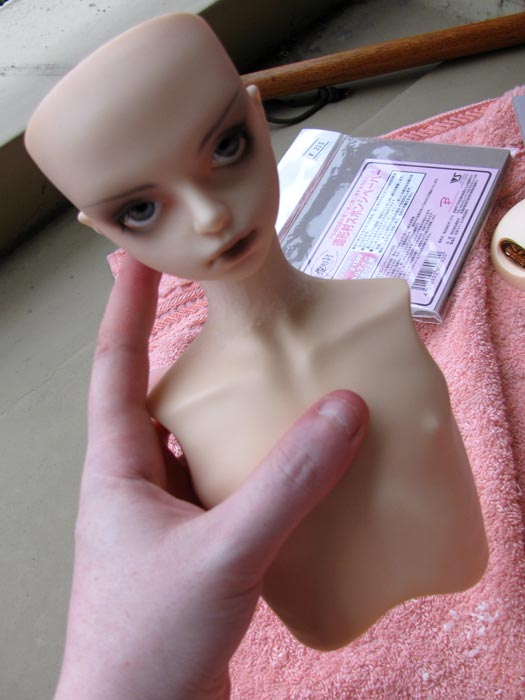
As I mentioned earlier, you will want to keep the head somewhere nearby and put it on the neck regularly to test it. Although you can use the tape measure to get a rough idea of what size you want, ultimately the deciding factor will be: does the head look natural on the neck? And only you (and the head) can decide what looks natural and right to you. So keep testing, and keep removing resin until you're happy.
It took me roughly an hour to an hour and a half to modify Meta's neck to a size that I wanted. It may be quicker for you, or it may take longer; it depends on how you pace yourself. If you're new to this sort of thing, I definitely recommend setting aside an afternoon for this. It's not something you want to rush, and you'll be more satisfied if you take your time and get it how you like it!
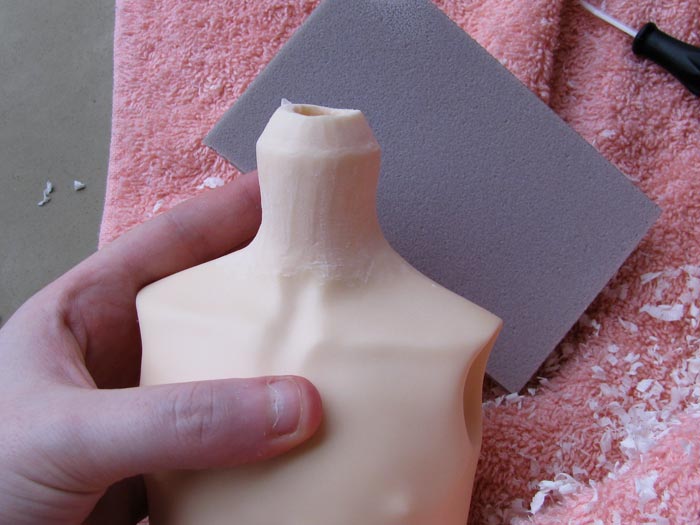
Once you're happy with the size of the neck, the next step is... sanding! All those rough scratches and bumps may look scary to you now, but trust me, they are going to go away. Cut an appropriate sized piece of the rough grade sandpaper (I used #400-600) and start sanding. Move in a smooth, circular motion, and don't concentrate on one spot for too long. Keep moving regularly over the whole neck so that you can give it an even sanding.
As you can see here, even just a couple of minutes of quick sanding will really smooth down those unsightly grooves, and you'll start to be able to see how nice the final shape of the neck is going to look.
I'll be honest; I took very few in-progress sanding pics after this because, quite frankly, sanding is tedious as hell and once you get past the initial smoothing, the changes are minute and difficult to catch on camera. This is the boring part of the modification, just so that you know. ^_~ Suffice to say, just keep on sanding all over. It will take you some time, and you don't have to do it all at once. If your hands get tired, and they probably will, put it away and come back the next day. I spread it out over two days myself.
Use the rough grade sandpaper until you have really gotten rid of all the rough grooves and the overall shape of the neck looks how you would like it to. Don't worry if your sanding motions have gone outside the ares that you modified -- so long as you've got an overall even shape, that's what counts. If at this time you notice something odd or uneven about the shape, don't hesitate to get out the Cera Kanna and fix it up before you go back to the sanding. Even a little bit of resin removed can make all the difference! Also, when your sandpaper gets worn down, don't hesitate to cut yourself a fresh piece. Using worn-out sandpaper is not very effective and will just make it take longer, and it takes long enough as it is!
If at any time the resin dust from the sanding is preventing you from clearly seeing how the neck looks, you can use a small paintbrush or makeup brush to dust the neck. You can also wipe the dust off on your towel or dropcloth.
Once you're happy with the shape of the neck, cut a piece of the fine grade sandpaper (I used #1200-1500) and give the entire modified area, as well as some of the surrounding resin, a nice buffing. At this point you're removing very little actual resin -- what you're aiming for is to give the resin a smoother edge that is similar to the feel of the rest of the body.
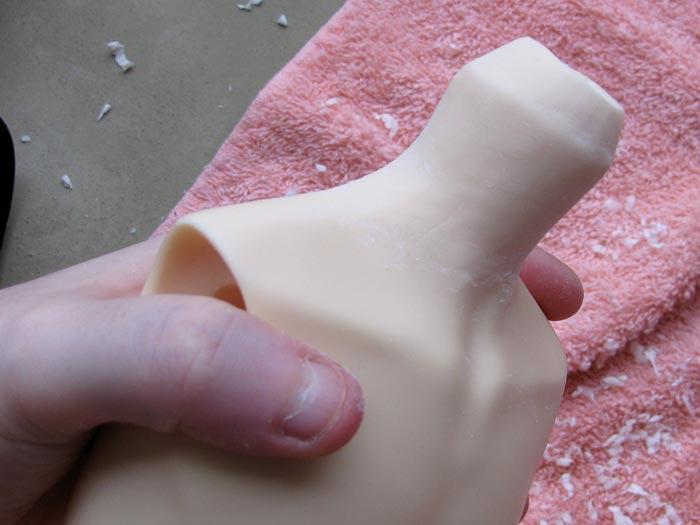
Voila! This is what your neck should look like once you're done! Doesn't look anything like those messy scratches we started with, eh?
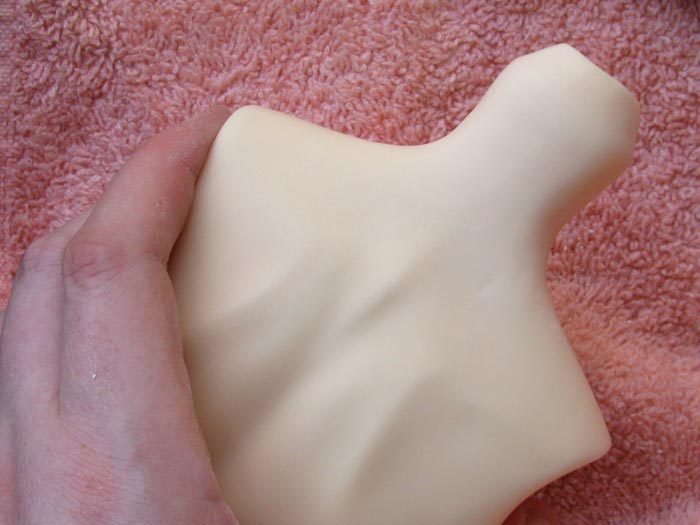
And here's the back, every bit as smooth. (^^) You might notice there's a little scratch/dent above his right shoulderblade. That was a small Cera Kanna miss on my part, and I was too tired to sand it out the day I took these pics. However I went back later and it's now completely gone, and you'd never know the difference. I wanted to show it to you to remind you that you don't need to freak out even if you make a mistake during the modification process! Anything can be fixed with a little sandpaper and effort.
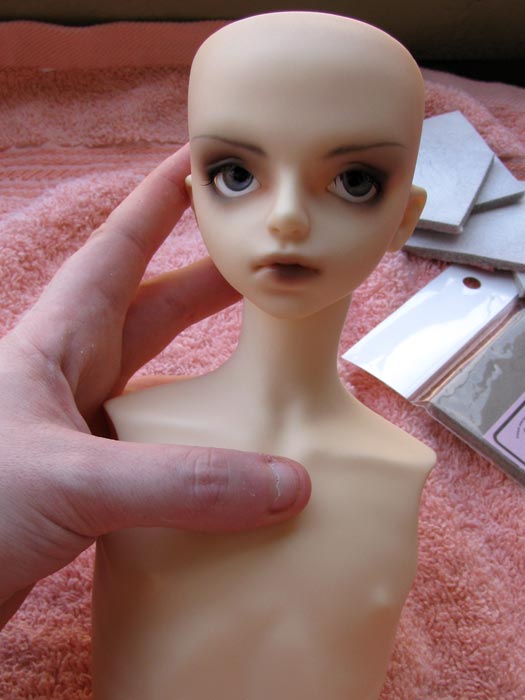
And the final and most important test. Are you happy with how it looks? And is your SD happy with how it looks? Once you reach that point, you can pack things up and congratulate yourself on a job well done. (I realise Meta doesn't look particularly happy here, but I promise he's smiling on the inside. ^_~)
I recommend that you give the torso a good wash (and dry) before you put it back on the body, as there will be a lot of dust residue, even if you can't see it. If you like, you can also give it a coat of Zoukei-mura Finishing Spray or Mr Super Clear. Using a coating spray will also give it a more even look and feel overall, although I didn't find it necessary myself.
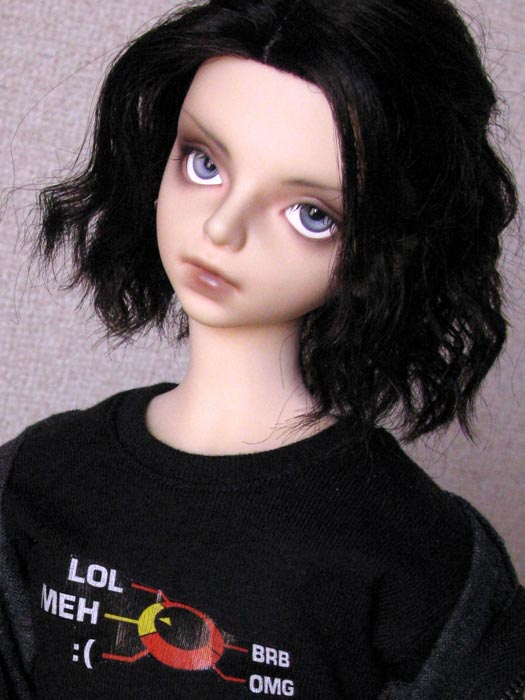
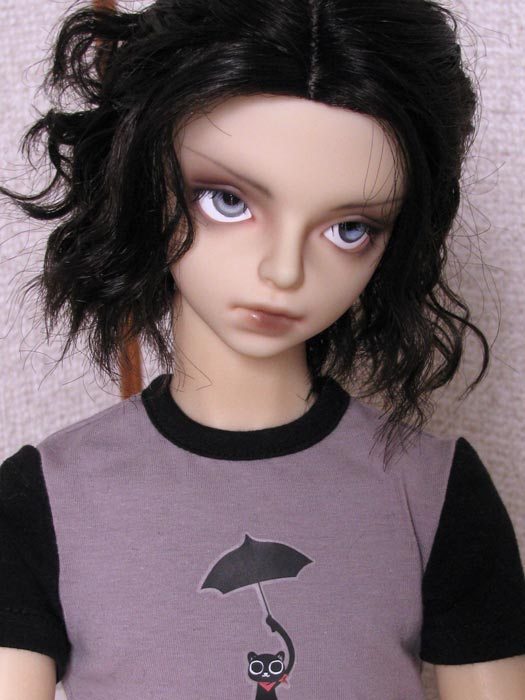
This is how Meta looks now that he has his new and thinner neck, and honestly it would be hard to say which of us is happier about it. It just looks so much better and more natural for him than it did before we modified him! If you're not happy with the thickness of the neck of your doll compared to the head, I certainly recommend that you consider modifying it. And as you can see, it's not all that hard -- it just takes a bit of time and effort. Good luck! (^o^)